Project Noel: Scanning 800 Slides From My Grandad's Archive
There is a colour positive slide sat on my desk from June 1964. Somebody in my family took it on holiday, popped it in a bag, and it seems to have been forgotten about for 60 years. It’s been in a bag atop my wardrobe for 3 years. Left there much longer and it will quietly become a pink rectangle.
So I have started digitising the lot. All of it. Slides, prints, albums, a driving licence, newspaper clippings and one photograph that might be from the 1880s.
I have called it Project Noel, after my grandad, who is the reason I picked up a camera in the first place. I spent a decent chunk of my childhood stood outside his darkroom waiting for him to come out!
Now, before this gets too misty eyed, I’ve already done the maths on what this project really is… Roughly thirty hours of sitting at a desk feeding small pieces of plastic into a machine and waiting. It is not romantic. It is barely even interesting.
But somebody has to do it, and that somebody is apparently me.
- Scanner: Epson Perfection V600, using Epson Scan 2
- Archive size: around 800 slides, plus albums, loose prints and documents
- Resolution: 4800 dpi
- Format: JPEG, 8 bit. Average file size 1.2MB
- TIFF comparison: 77 to 82MB per file, no visible benefit on faded slides
- Scan time: 3.5 minutes per four slides clean, 5 minutes with dust removal on
- Projected total: 12 to 17 hours of scanning, realistically double once handling is counted
- Cost: nothing. I already owned the scanner
What Was Actually in the Boxes I inherited
I did not inherit a tidy archive. I inherited bags and boxes.
Most of it is colour positive film, slides, loose and jumbled with no labels, no dates and no order. Kodachrome, Fujichrome and a load of Fuji colour. I would guess ninety percent of it is family and friends, but knowing my grandad there will be gems buried in there.
Then it gets more interesting. There is a photo album from the 1930s, so the Great Depression, absolutely stuffed with tiny black and white prints. Some have shifted in their mounts. Some have writing on the back, which is a small miracle for the impeding archiving project!
There is a Kodak photo wallet from August 1954 which is worth digitising for the graphic design alone, never mind the photos inside it. A driving licence from 1972. Assorted documents and newspaper clippings.
And then the one that stopped me. A cabinet portrait, stamped W.S. Willes, 101 to 102 Kings Road, Reading. Written on the back is a note written in faded biro identifying the handsome couple as my nan's great grandparents, which makes them my great great great grandparents. Six generations back!! I did some googling and there’s a bunch of these mounted portraits on ebay stating circa 1880’s but this really is a research job for another day.
Anyway, It seems I am the archive now, and in its current physical form a lot of it may not last for much longer.
My Advice… Go and look in your attic. I mean it!
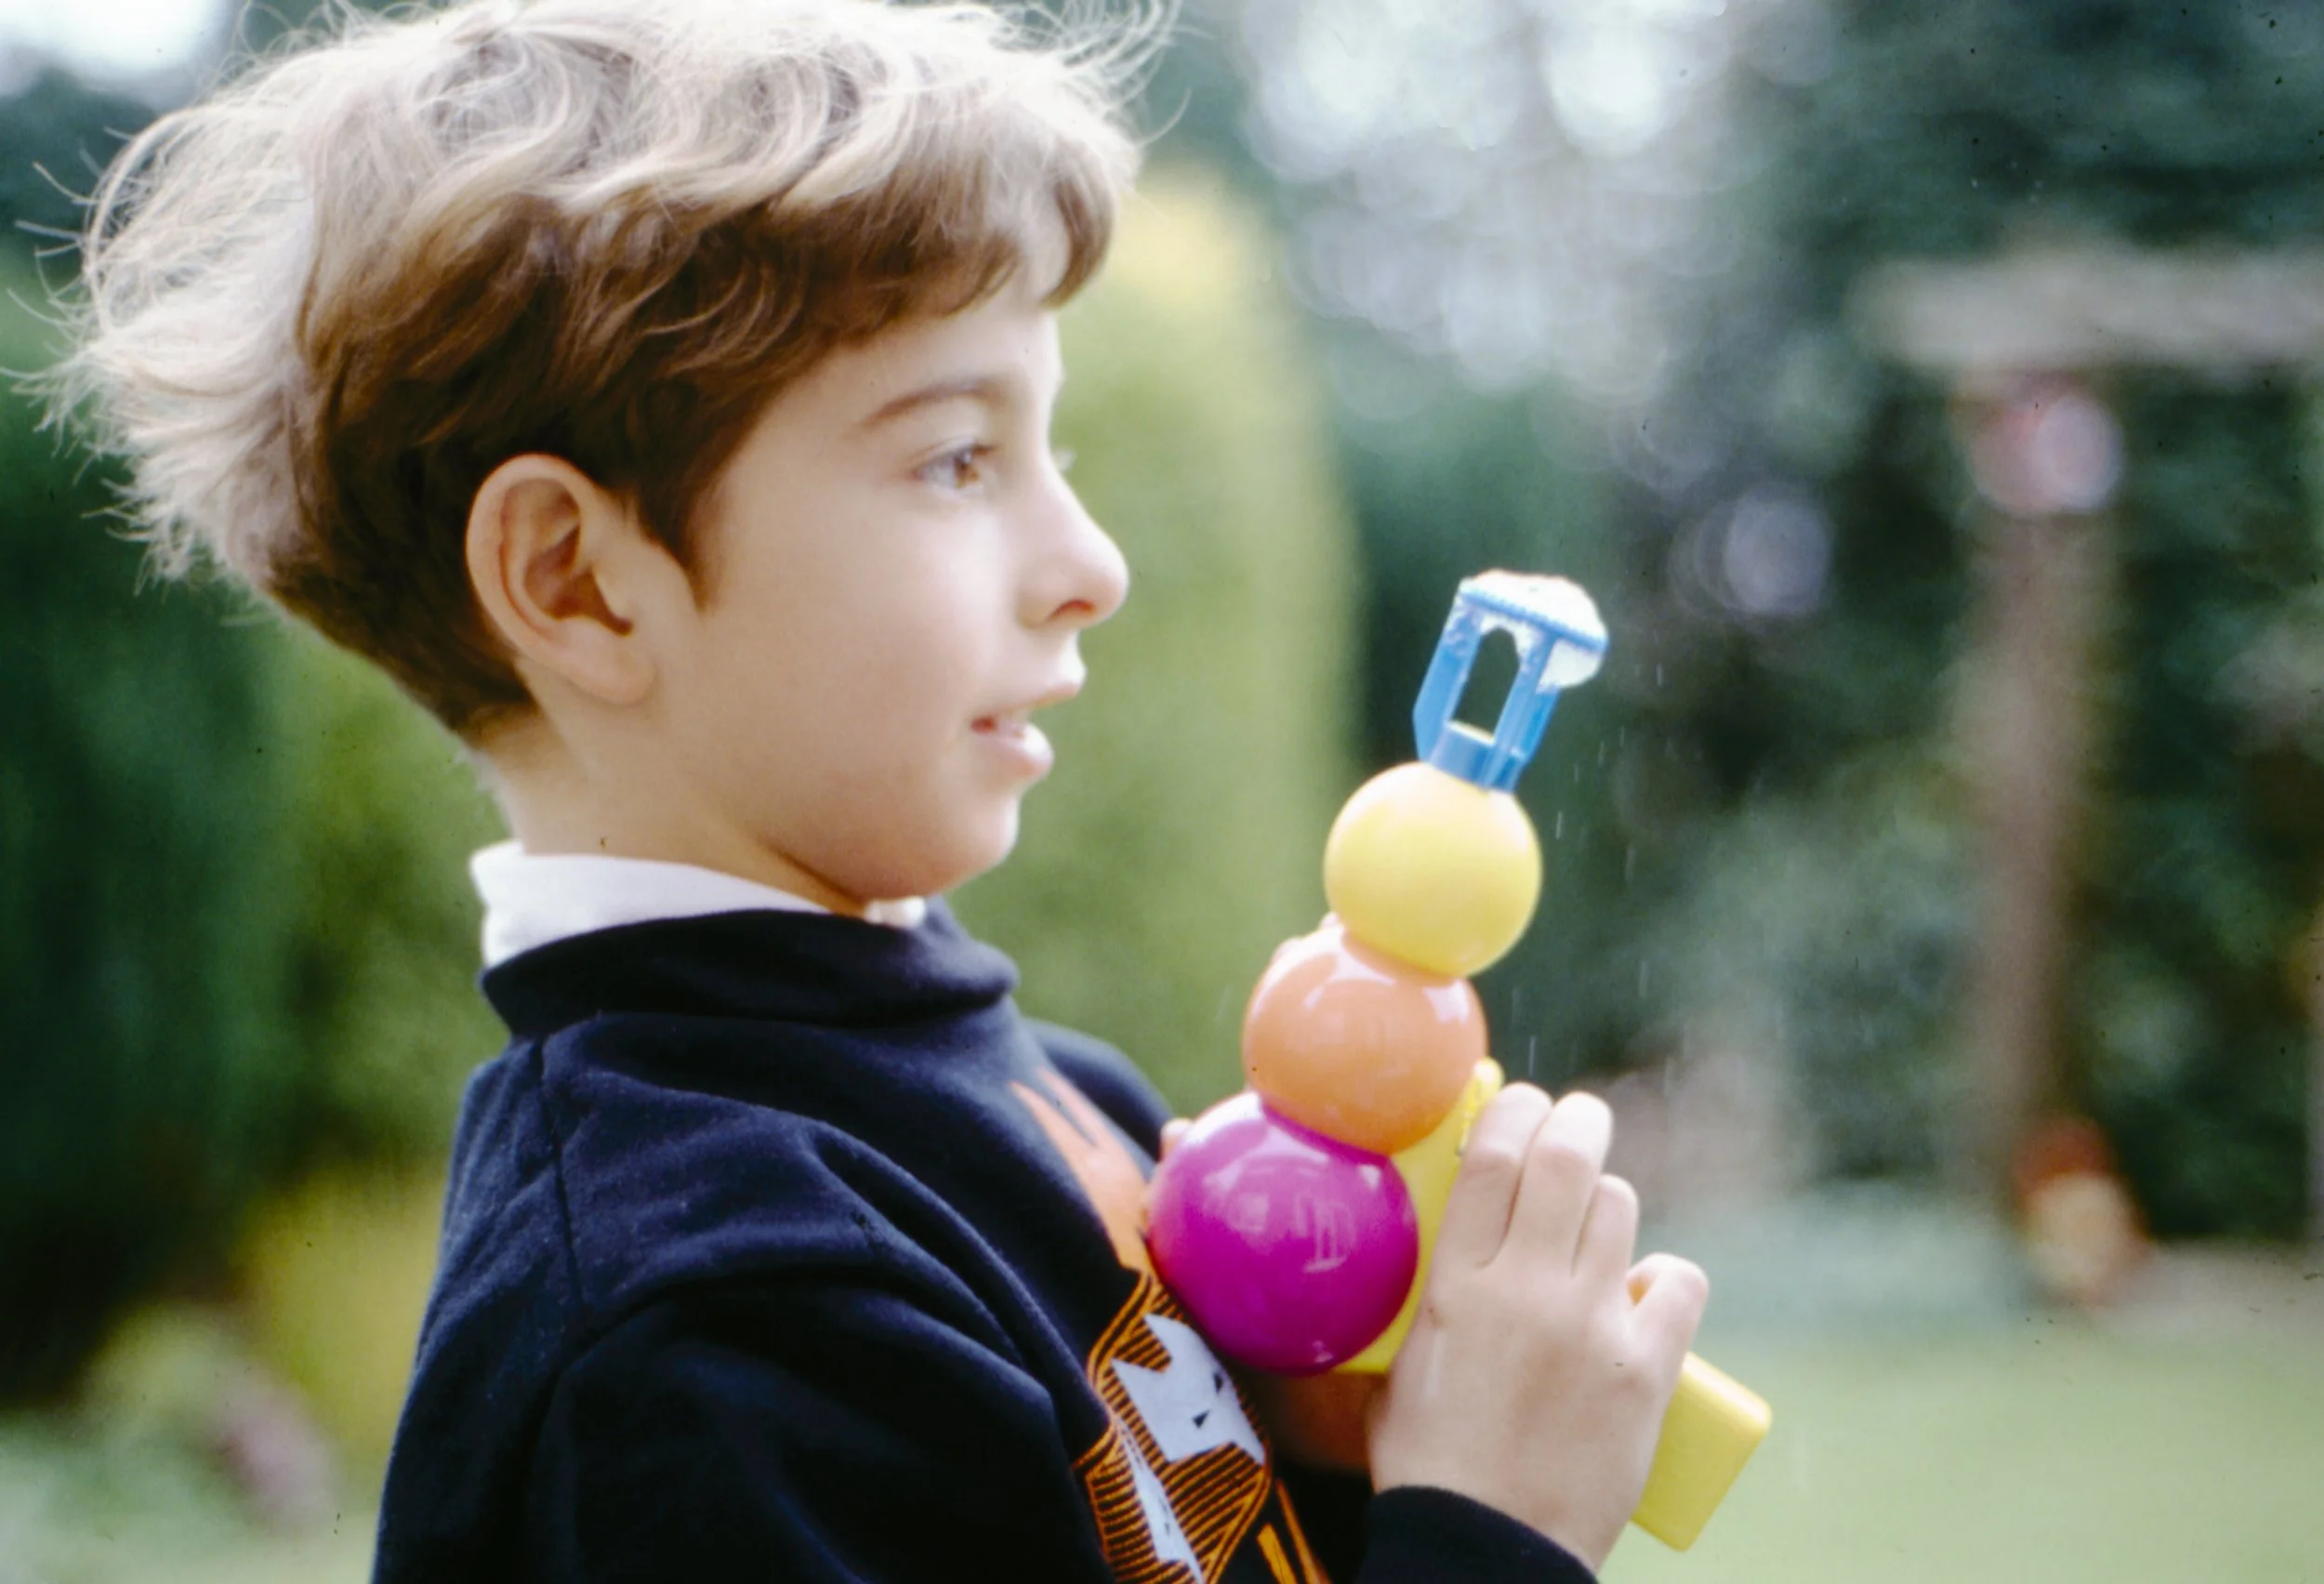
I remember that bubble gun!! Well I do know I’ve scanned this slide!!
Before You Scan Anything, Give It a Sniff
This is important, and it is the reason I’ve started this project instead of procrastinating much longer. Old film destroys itself.
Before the 1950s, film base was cellulose nitrate, which was flammable enough that there were genuine regulations about how much of it you were allowed to keep in one building. In 1937, Little Ferry New Jersey there was the Fox Vault Fire incident. A summer heatwave triggered the spontaneous combustion of deteriorating nitrate film, destroying over 40,000 reels and wiping out roughly 75% of Fox’s pre-1932 silent film back catalogue including the entire starring catalogue of Theda Bara!!
From roughly the 1950s to the 1990s the standard was cellulose acetate, which is safer but has its own problem. Modern film is polyester based, effectively inert, and rated to last about 500 years in decent conditions.
Your grandad's slides are almost certainly acetate.
Acetate breaks down through hydrolysis when it gets warm and damp. It releases acetic acid, which is the stuff that makes vinegar smell like vinegar. That is where the name comes from. Two things make it nasty. It accelerates itself, so the reaction speeds up as it goes. And it transfers to whatever is stored next to it.
Which means storing eight hundred slides loose in a bag is, in hindsight, not my finest work.
The black border trick
One of the mounts had come apart, glue long dead after 60 years of storage, so I could slide the film out and have a proper look at the edge.
The black border on a slide is not black ink. It is all three colour dyes stacked on top of each other. As those dyes fade, the border drifts towards magenta. So you can judge the state of a slide with a loupe on a lightbox in about four seconds, without scanning anything.
Nobody sits down and decides to throw away their family photographs. They just put them in the attic and let chemistry do it for them. Don’t be that guy.
Why a Flatbed Scanner and Not Something Cleverer
There are better ways to do this. I am aware of that.
Dedicated film scanners can produce sharper results but can cost more than a flatbed with an adapter. Most models handle strips rather than mounted slides, which isn’t ideal for me, especially seeing as I also have photographs and documents to archive.
Camera scanning with the A7R5 and a macro lens is faster at the capture stage. It is also slower at every other stage, has no automated dust removal at all, and needs a copy stand, a light source and a level of setup precision I could not face across eight hundred frames!
Paying a service would be the sensible option if my time were worth anything, and it is worth considering for the truly fragile stuff.
I used the Epson V600 because I already own it and eight hundred slides is not the job you buy new kit for. That is the whole reasoning. Sometimes the honest answer is boring. Plus, I may get to use it for other projects in the future, ones that don’t involve slides and negatives.
The Settings I Landed On
Resolution: 4800 dpi
A mounted 35mm frame at 4800 dpi lands around 30 megapixels, which is more than enough to make a large print from a slide the size of a postage stamp.
Worth flagging though: It can go up to 6400 dpi, and independent testing has put the V600's real optical resolving power a very long way below that. You are past the point of capturing new detail well before you hit the higher resolutions. I went with 4800 because it sits comfortably above what the scanner can actually resolve, which is where you want to be for an archive master.
Format: JPEG
This is the one I went back and forth on, so here are the actual numbers.
| Format | File size | Bit depth | DPI |
|---|---|---|---|
| JPEG | 1.2MB average | 8 bit | 4800 |
| TIFF | 77 to 82MB | 48 bit | 3200 |
Roughly seventy times the size. And on these particular slides, sixty year old colour positives with faded dyes and compressed contrast, I could not see a discernible difference between the two even when I tried to do some light editing in Lightroom. There is simply not much left in the file for a TIFF to protect.
The counter argument is real and I want to be straight about it. TIFF is the proper archival choice. Eight hundred TIFFs is about 64GB, which is one cheap drive, and rescanning eight hundred slides is thirty hours I will never get back. If you are scanning something genuinely irreplaceable scan it as a TIFF and do not think twice.
But for eight hundred holiday slides, these are an archive, not raw files. I am not planning to do heavy editing work on them. JPEG is fine.
One thing I would change. Epson Scan 2 defaults to a middling JPEG quality setting, which is how a 28 megapixel scan ends up as a 1.2MB file. That is heavy compression. Push the quality slider up and each file lands nearer 8 to 10MB, taking the whole archive from about 1GB to about 8GB.
On a NAS that is nothing. Capturing 28 megapixels and then squeezing it down to 1.2MB is a bit like ordering a proper Sunday roast and eating it through a straw. Turn the quality up. You just need to weigh up the archive vs. the current (2026) strain on storage costs as they continue to skyrocket!
Dust removal: on
The V600 hardware supports Digital ICE, which uses an infrared pass to physically map dust and scratches. Epson Scan 2, the current software, does not offer it. What you get instead is software based dust removal, which analyses the image itself.
If you want true infrared ICE on a V600 you need the older Epson Scan legacy driver or third party software like VueScan. Worth knowing, because a lot of guides out there still assume ICE is sat in the menu waiting for you, despite the sticker also still being on the front of my unit!
The software version does a half decent job. It costs 1.5 minutes per batch of four, and I left it on.
See the dust in the sky in the examples below… sorry it’s a little hard to see!!
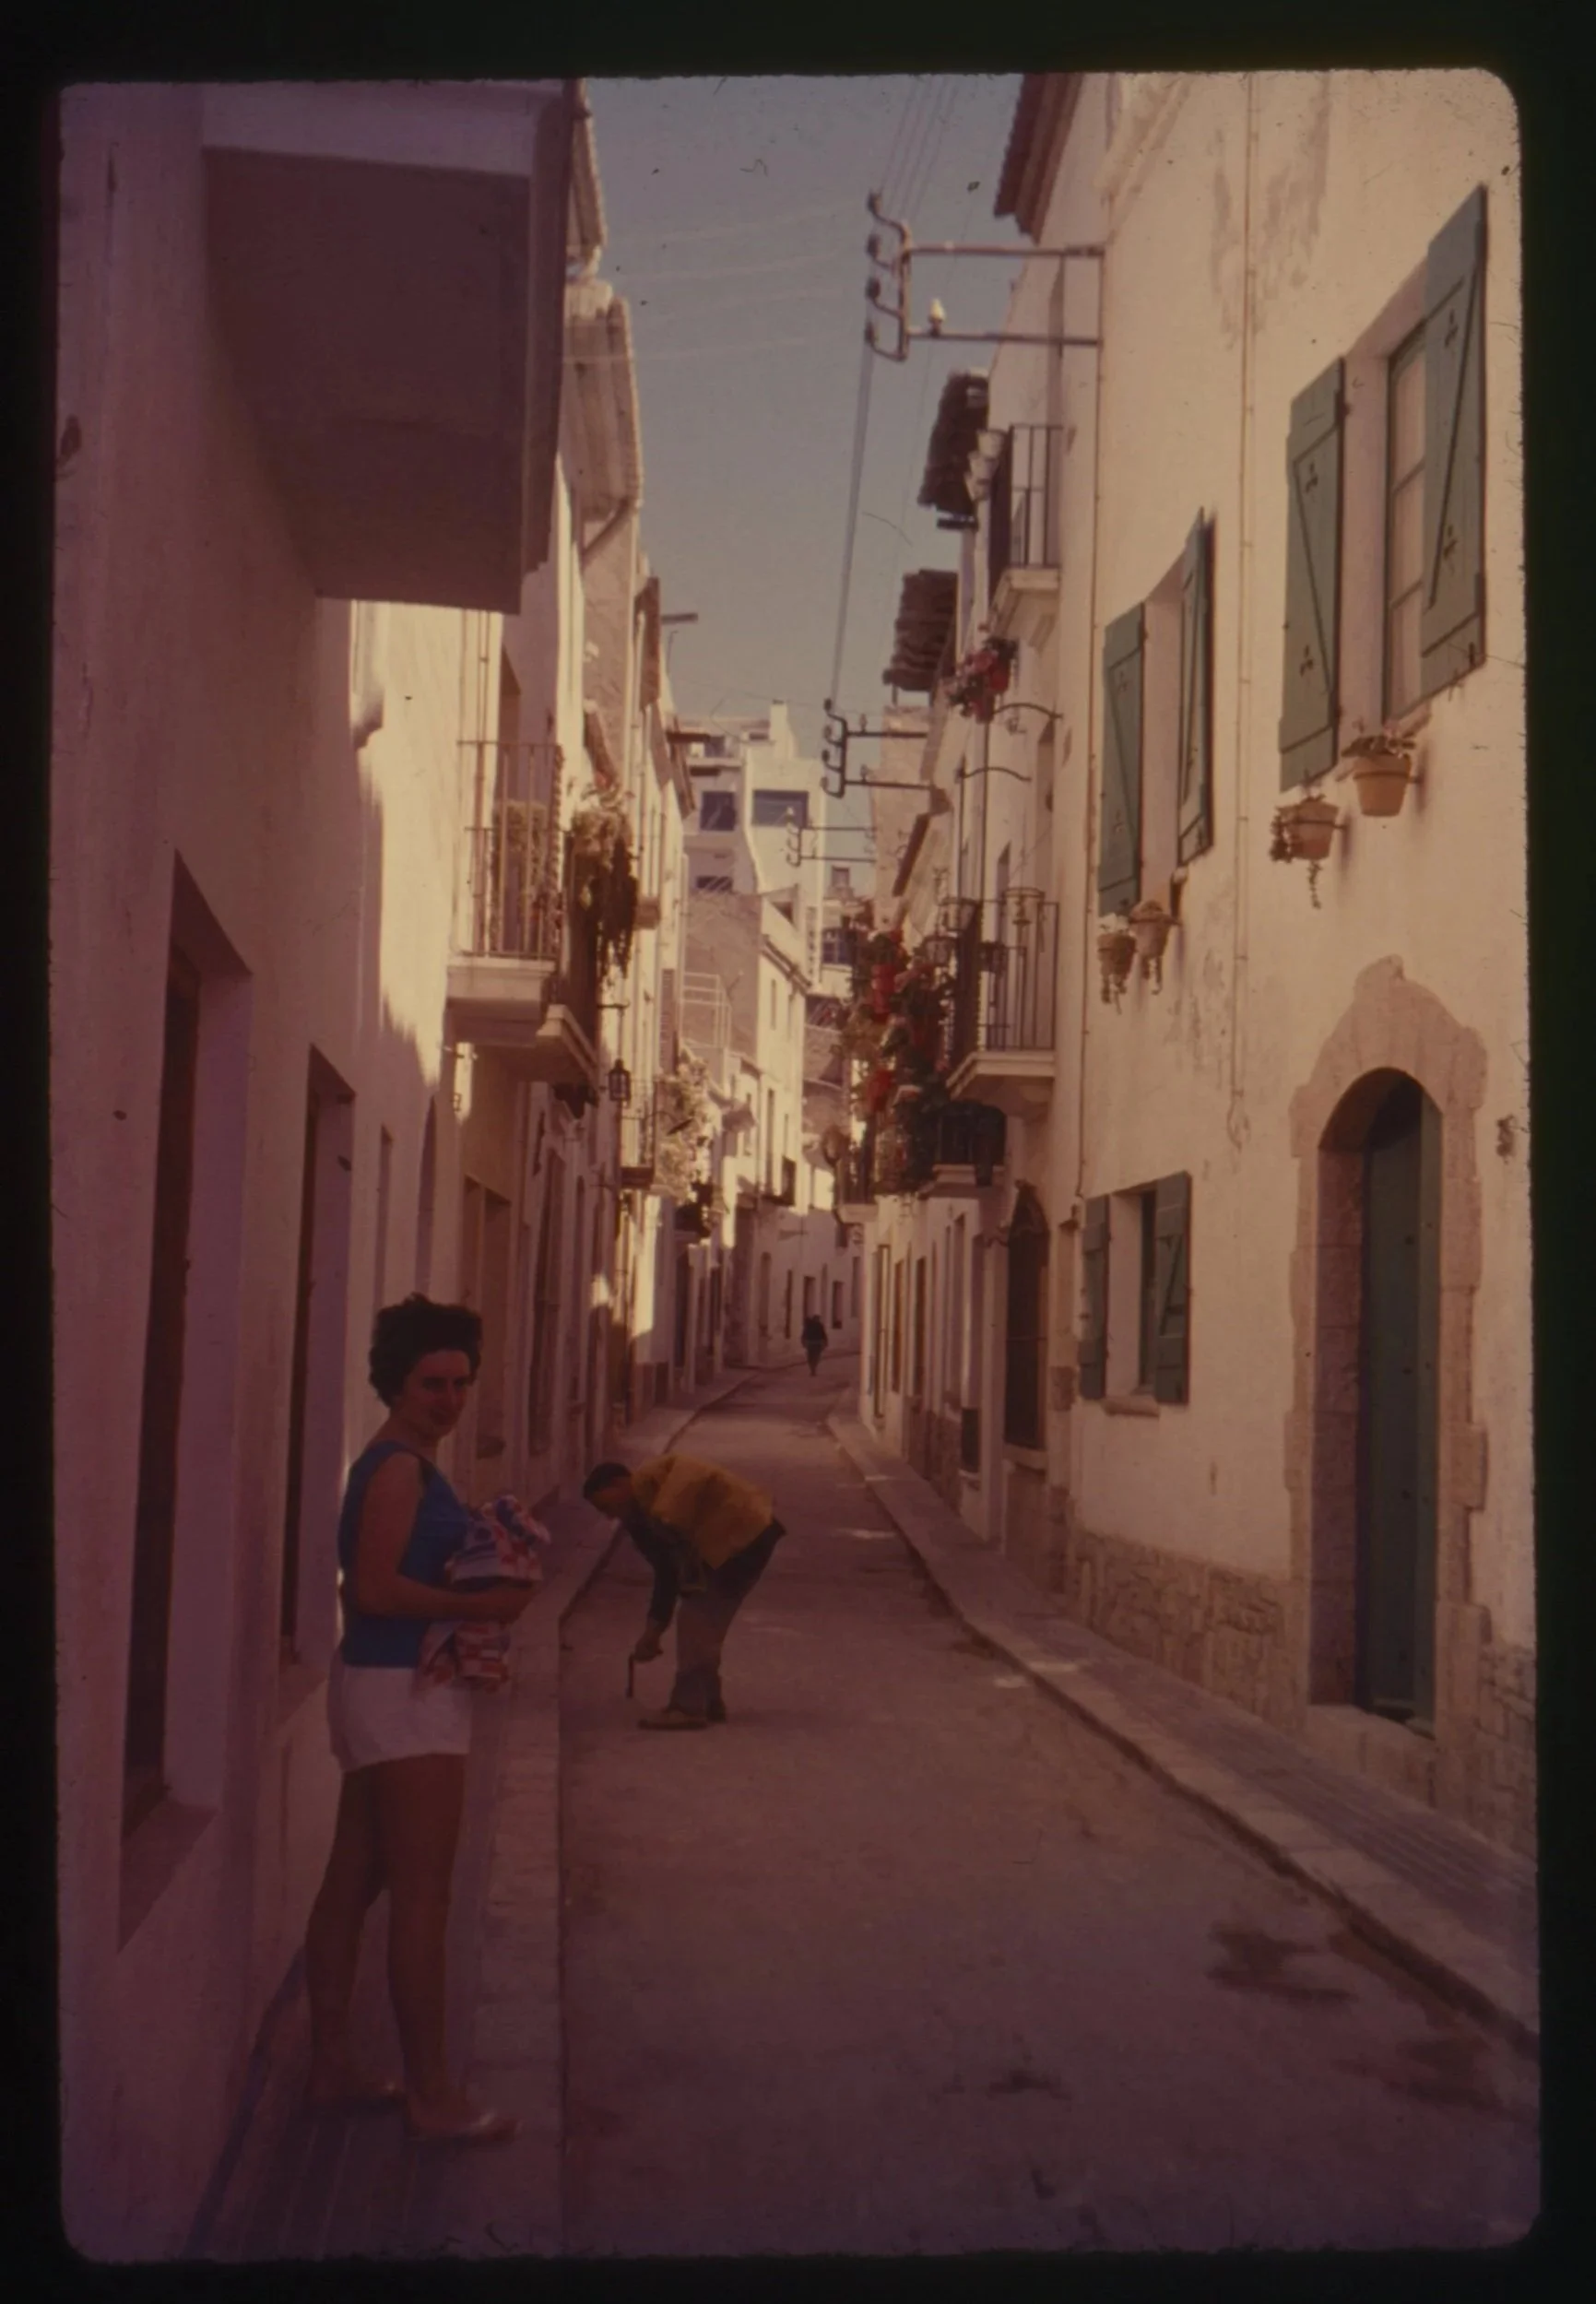
Dust Remove OFF Colour Restoration OFF
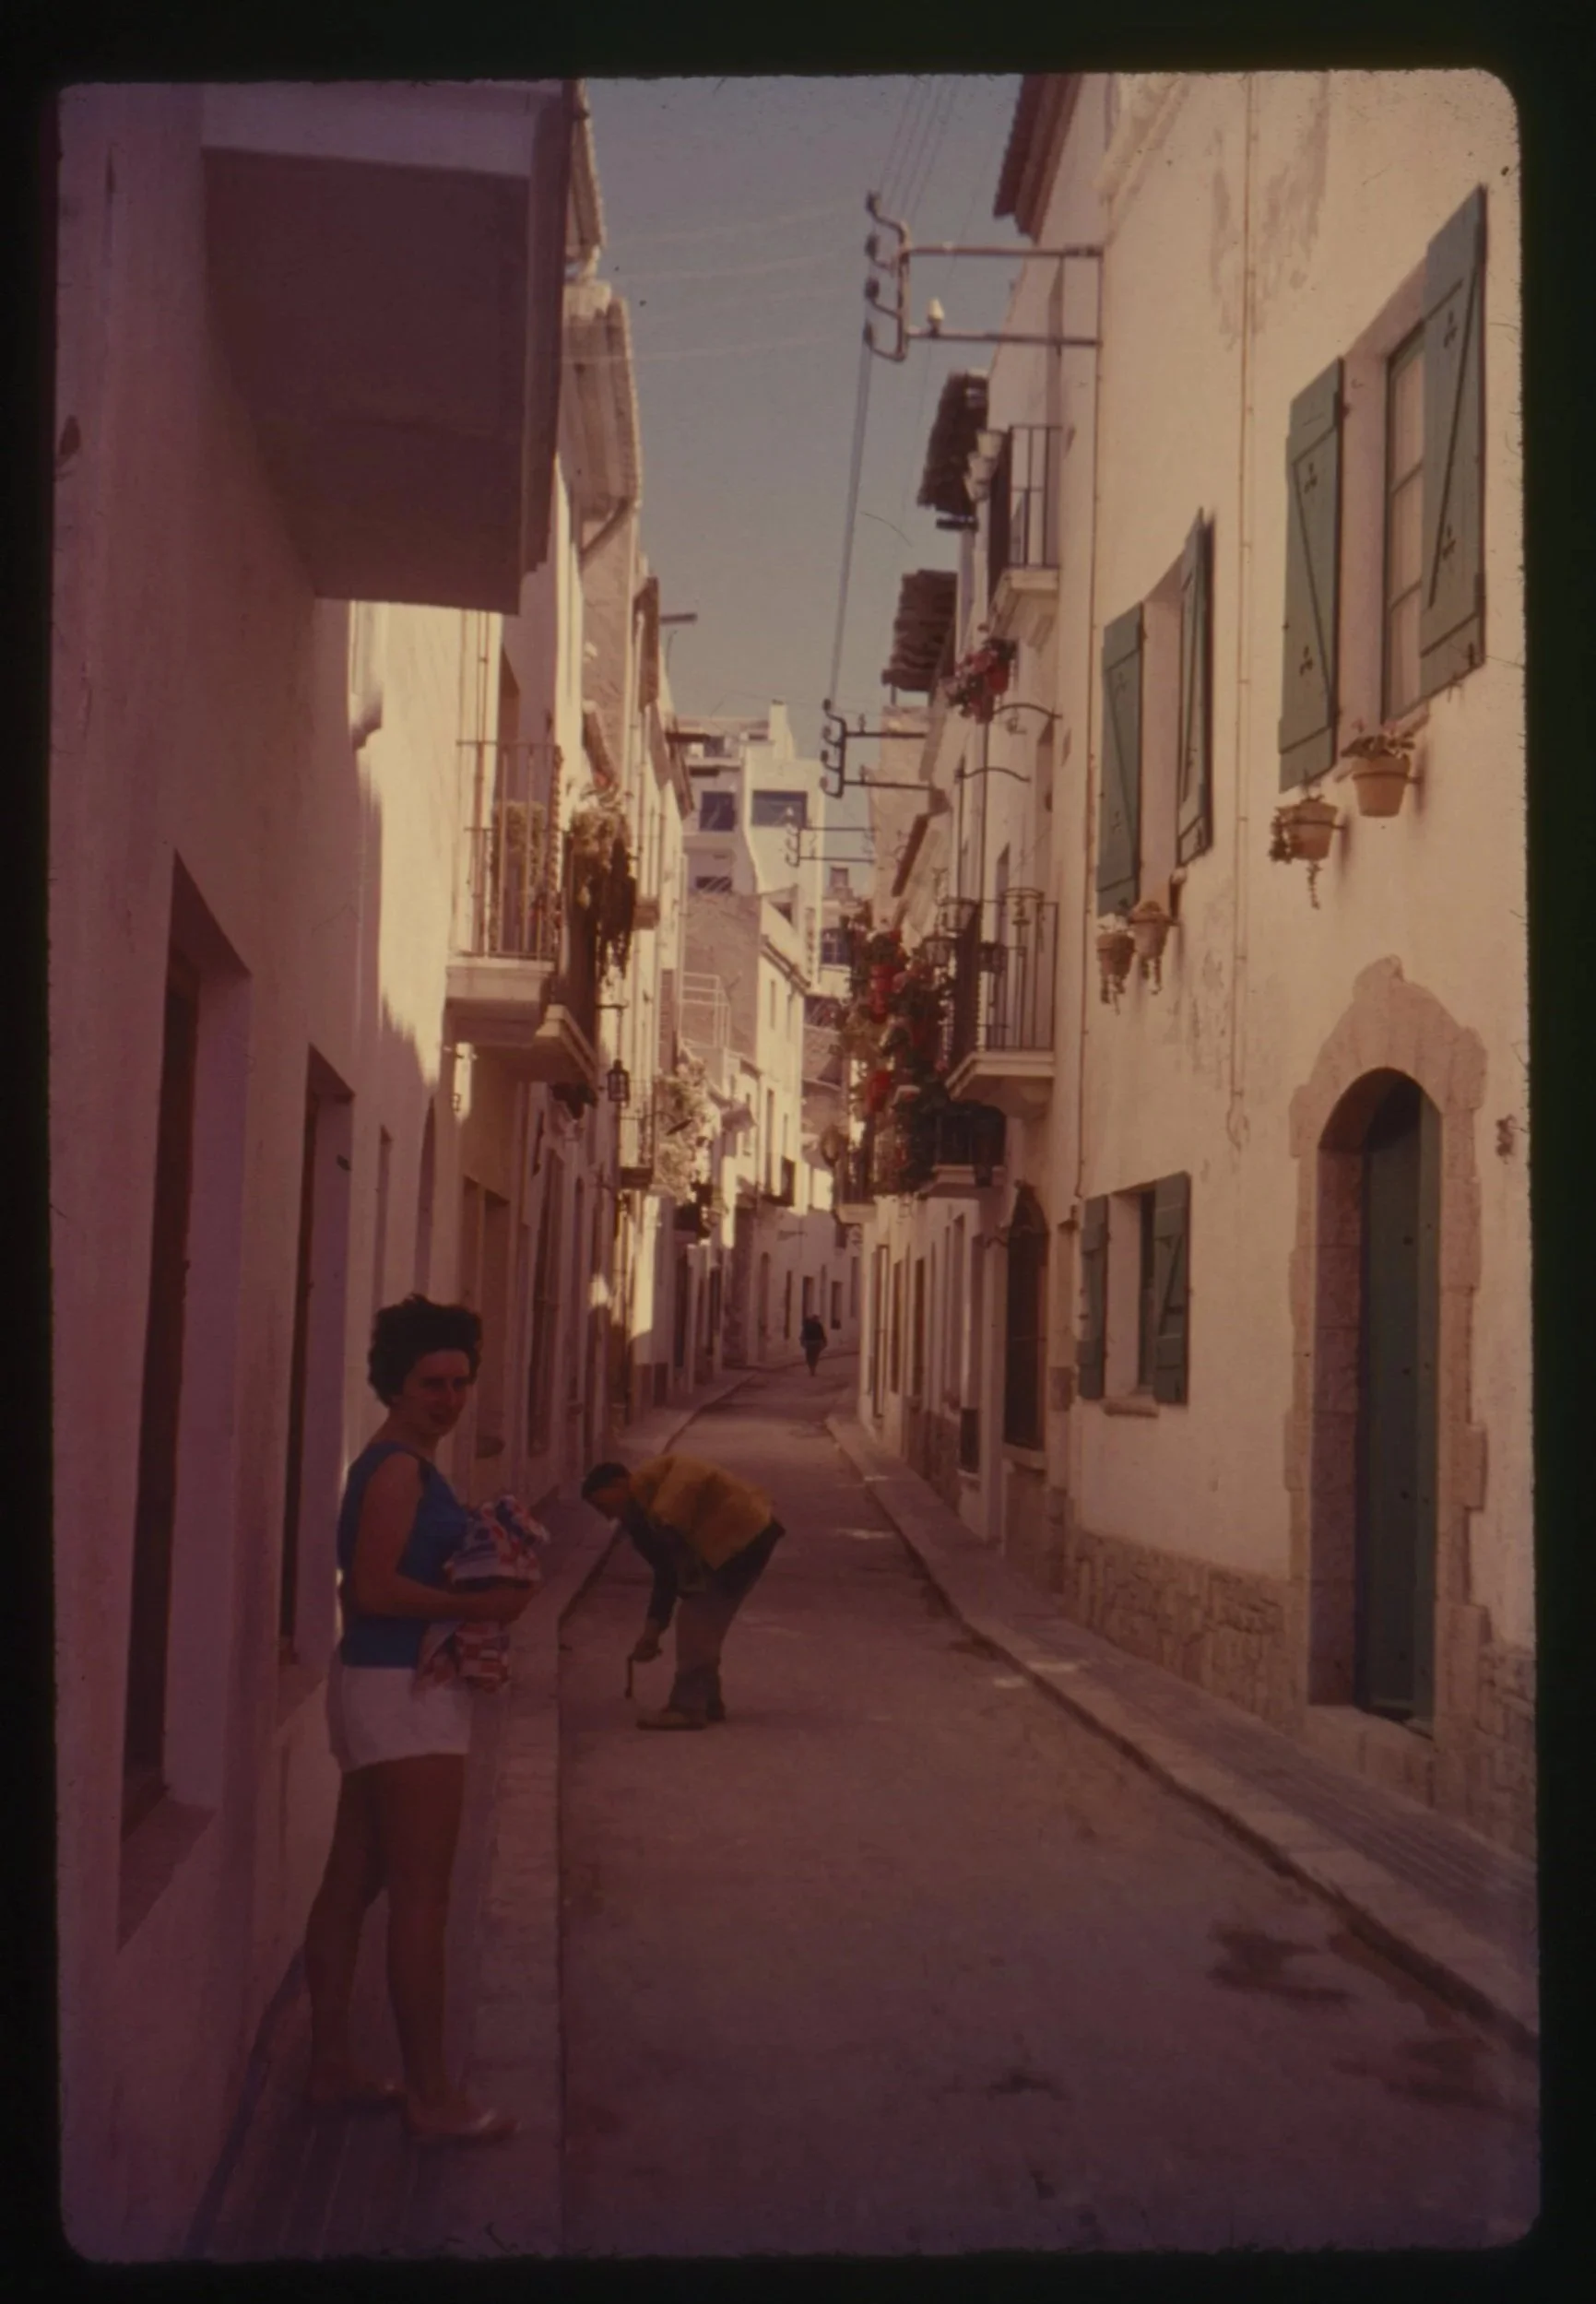
Dust Removal ON - Colour Restoration OFF
Colour restoration: on
This one surprised me. It does a genuinely good job of pulling white balance and tint back towards something sensible on faded slides. For newer slides I had mixed results, often falling back towards a cooler balance for images taken at the start or end of the day. Y
Yes, you could throw everything into Lightroom and correct it yourself. But after you have spent however many hours scanning, you do not want another seventeen hours of colour correction waiting for you. Let the software have a go first.
Colour Restoration OFF - Dust Removal ON
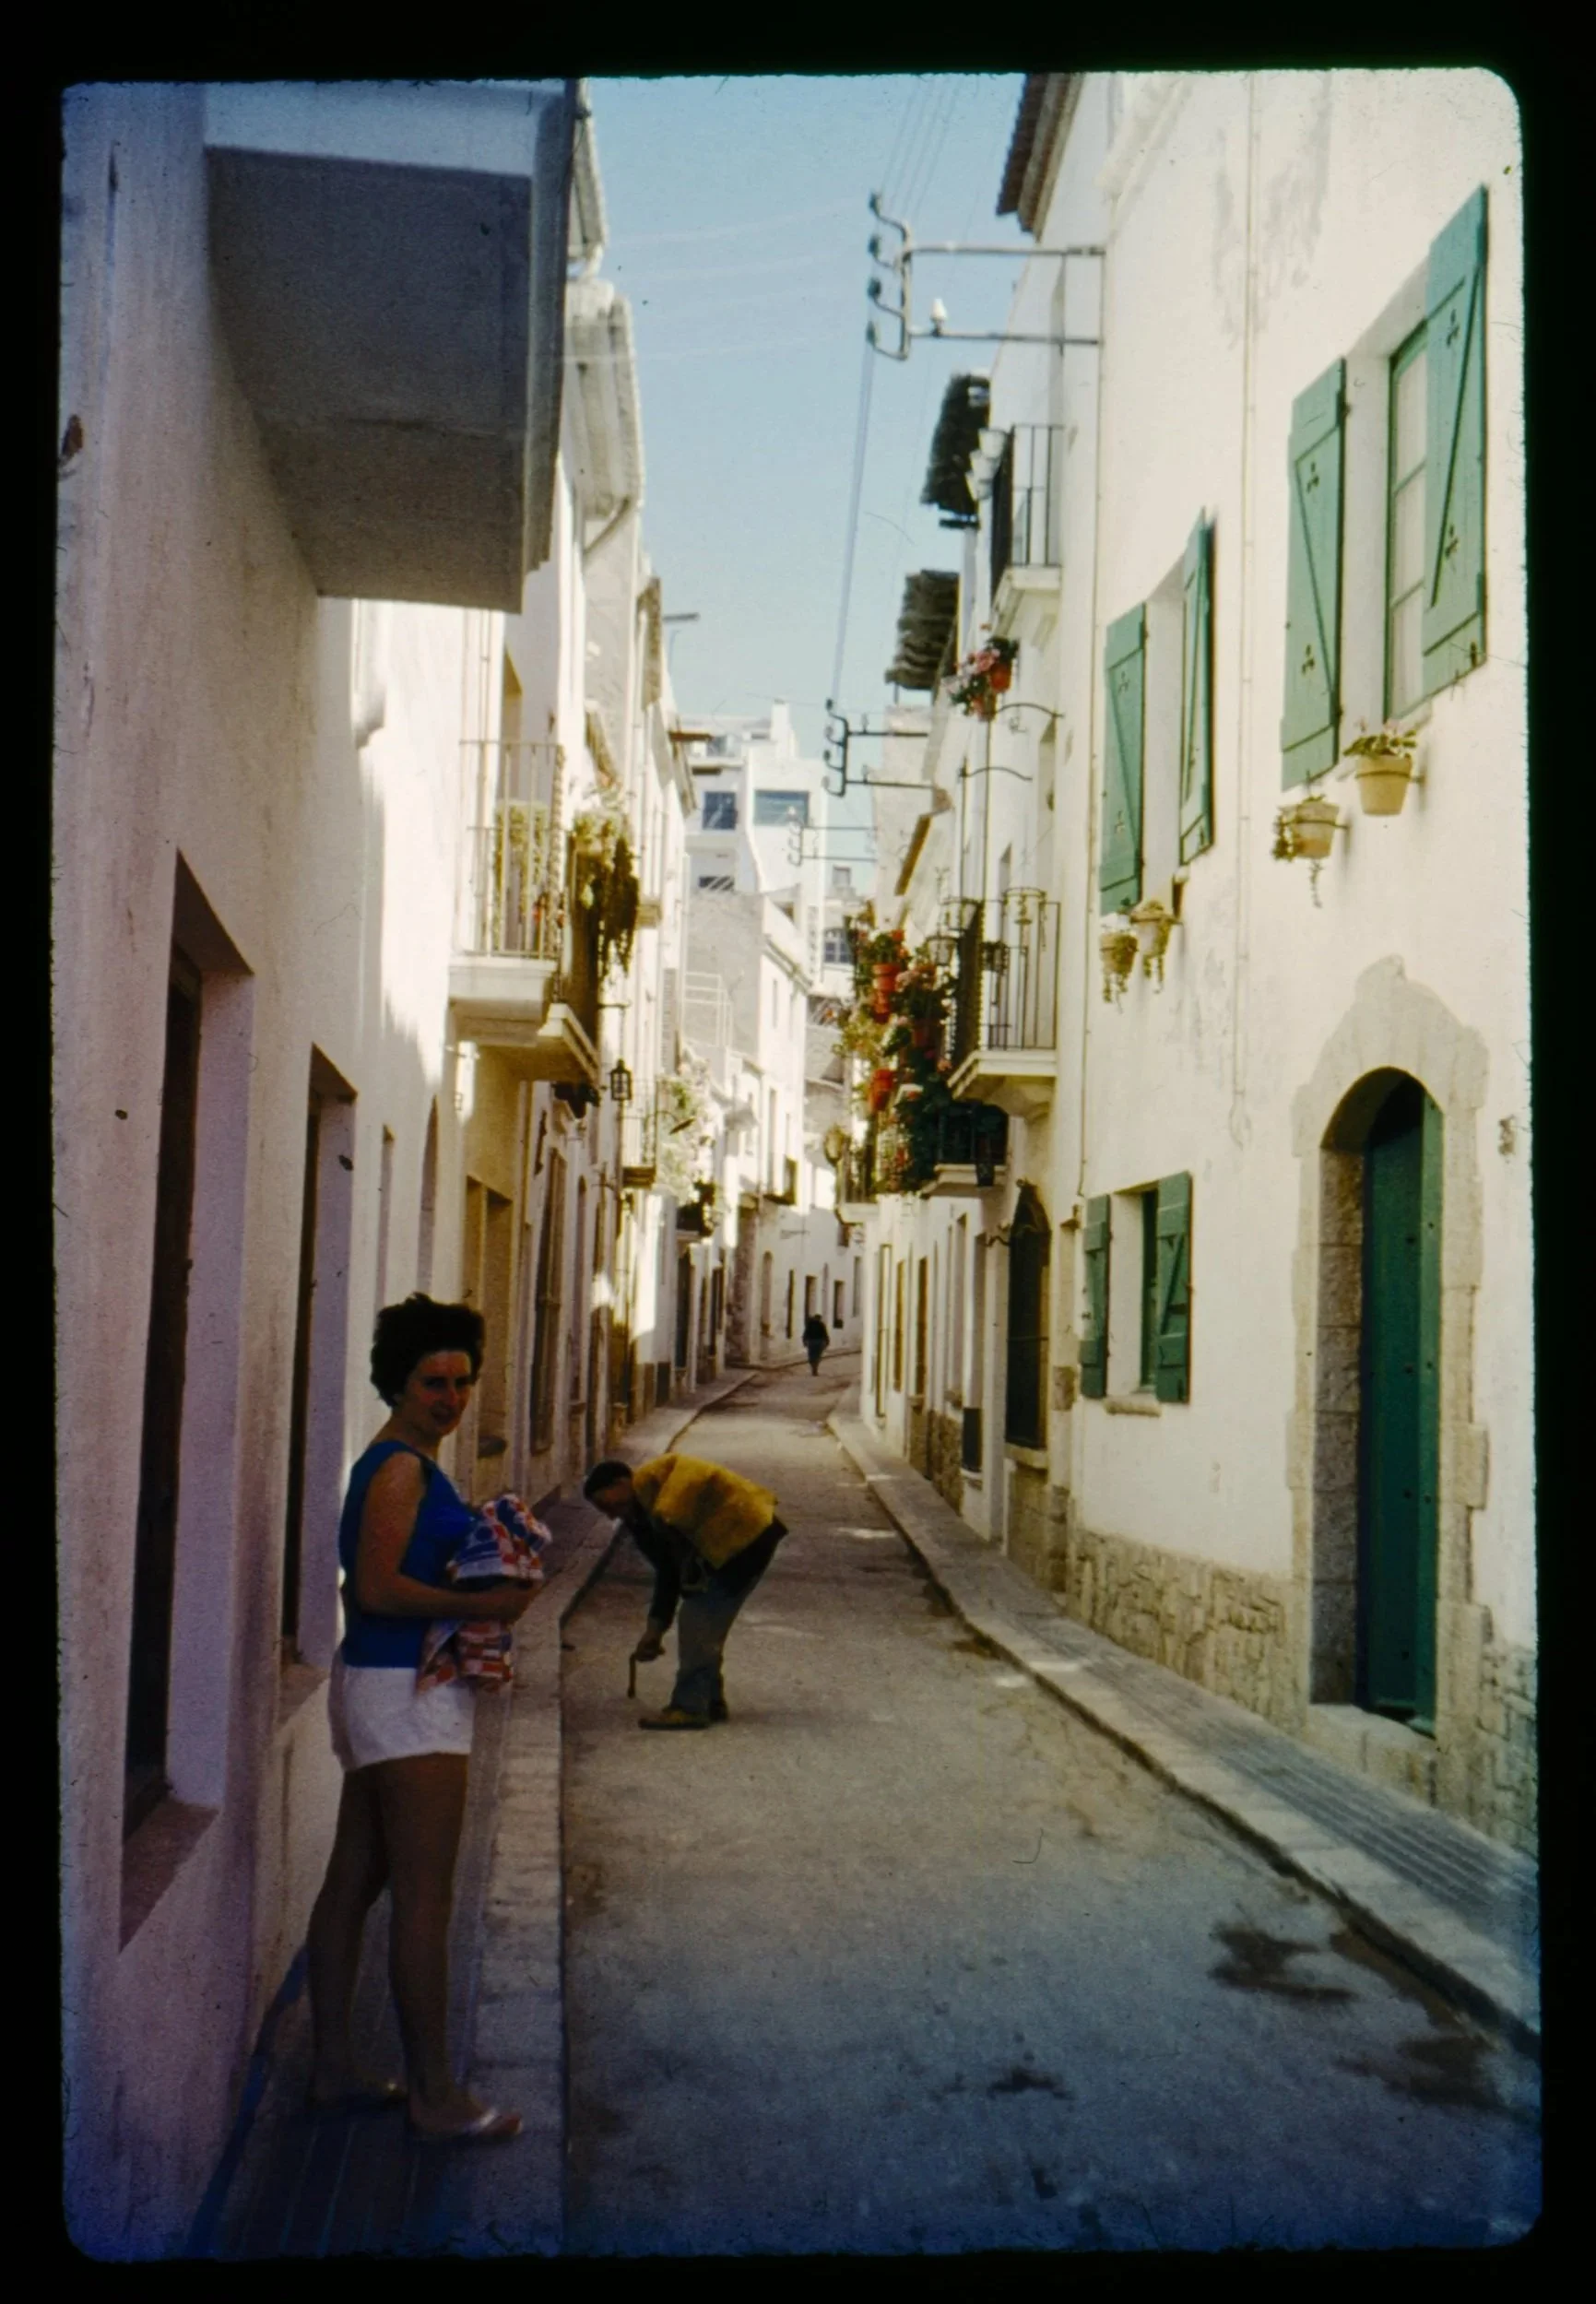
Colour Restoration ON - Dust Removal ON
How Long 800 Slides Actually Takes
The V600 holder takes four mounted slides at a time. My timed test results are below:
| Setting | Per batch of 4 | Across 800 slides |
|---|---|---|
| No dust removal | 3.5 minutes | around 12 hours |
| With dust removal | 5 minutes | around 17 hours |
Now the honest bit. That is scan time only. It does not include the preview pass, rotating frames in the software, loading and unloading the holder, or blowing dust off the slides in the first place, which is a job in itself.
Realistically I am looking at double. Call it thirty hours.
That is a full working week, spread across evenings and the odd lunch break… multiple cups of tea will need to be consumed during this operation for sure.
Naming, Folders and Backups. The boring but essential bits
I promised this in the video, so here it is.
The problem with an inherited archive is that it arrives jumbled. No dates, no order, and half the time no idea who you are looking at. Any naming system that assumes you know what you have got will fall over on day one. So the system has to work with what you do not know.
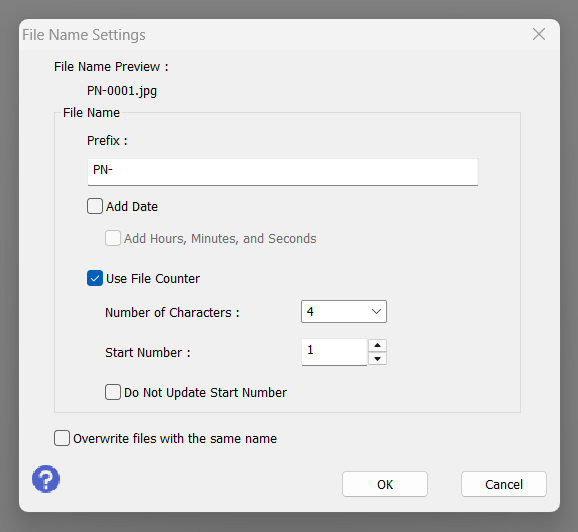
The filename
I use a fixed accession number as the spine, then whatever information I actually have:
Make it stand out
Whatever it is, the way you tell your story online can make all the difference.
PN for Project Noel.
Then a date if I know it (19920601 so YYYYMMDD)
Then a broad description, which for most of these is going to be something as vague as holiday or family or unknown.
Then a sequential number that never changes for the life of the file.
The first three can be added manually into the File Name Settings in the Epson Scan 2 software as a Prefix. The sequential number comes from the software.
The metadata
Names of people go in the IPTC caption and keyword fields in Lightroom, not in the filename. You will learn who these people are gradually, usually by showing them to somebody older than you. Metadata can grow. Filenames should not keep changing.
Folders
Simple. Raw scans are never touched. Anything I work on gets copied into 02-edited. If I make a mess of an edit, the original is still sat there untouched. Key here is to have a non destructive workflow.
/ProjectNoel
/01-raw-scans
/02-edited
/03-documents
/04-prints-and-albums
Backup
Full 3-2-1. Three copies, two different types of storage, one off site.
NAS as the working copy
External drive as the local backup
Cloud as the off site copy (google drive etc.)
Worth saying plainly, because it catches people out: a NAS is not a backup. It is one copy in one building. Yes, it’s mean to protect you from a failed drive across and array of drives but a flood, a fire or a burglary takes the whole thing, and unlike the slides there is no faded original to fall back on.
What I got wrong about the colours
Here is where I have to admit I was wrong on camera.
I went into this convinced the colours in these old slides were something modern gear simply cannot do. More natural. More organic. Nothing like the homogenised stuff that comes off a phone. So I put a scan next to a similar shot from my X100VI, using the in camera film simulations. And with a bit of work you can get the modern file remarkably close. Sixty years of technological progress will do that. All this talk about colour science, blah blah blah, you can make any image look a certain way, it’s just how easy/hard it is to do.
Which means it is not the colour palette. Not really. It is the softness. The slightly wrong contrast. The dust you could not be bothered to remove, the edges that are not quite sharp, the sense that a physical object sat in a physical place and light fell on it.
The charm is the flaws. Which is a bit inconvenient, given I have just spent an hour turning the dust removal on and blowing dust off every slide!
What's Next
There is a lot left. Eight hundred slides is one bag, and there are prints, albums and documents behind it. The 1880s cabinet portrait needs proper handling and probably a TIFF. There is a whole question about restoration, colourising old black and white images and how far you should go, which is big enough to need its own post.
And I am going through my mother's attic next, because that film is not getting any younger either. That’s a few boxes of photo sleeves, negatives and all.
If you take one thing away from this, make it the sniff test. Go and find your negatives, seal a few in a bag, and have a smell. If it is vinegary you have got a problem and you have got it now rather than in ten years.
The photographs in your attic are the only copies that exist.
Frequently Asked Questions
-
Around 12 to 17 hours of pure scanning on an Epson V600, depending on whether dust removal is switched on. In practice, budget double that. Loading the holder, running previews, rotating frames and cleaning dust off the slides takes roughly as long as the scanning itself.
-
For faded colour slides where you are building an archive rather than an editing library, JPEG at maximum quality is sufficient. At 3200 dpi and 48 bit colour my TIFFs came in at 77 to 82MB against 1.2MB for JPEGs, with no visible difference. Use TIFF for anything genuinely irreplaceable or anything you plan to restore properly.
-
Somewhere between 3200 and 4800 dpi covers almost every use, including large prints. Ignore the headline figure on the scanner box. Consumer flatbeds do not optically resolve anywhere near their advertised maximum, so scanning higher mostly produces bigger files rather than more detail.
-
Yes. On the V600 it adds about 1.5 minutes per batch of four slides, which across 800 slides is roughly five extra hours. Removing that dust by hand in Photoshop would take considerably longer.
-
The hardware does, but Epson Scan 2 does not offer it. The current software provides software based dust removal instead, which analyses the image rather than using an infrared pass. To access true Digital ICE you need the older Epson Scan legacy driver or third party software such as VueScan.
-
Seal them in a bag, leave them a while, then open it and smell. A vinegar smell means the acetate base is breaking down and releasing acetic acid. You can also check mounted slides under a loupe: the black border is made of stacked colour dyes, so as it softens and shifts towards magenta the image is fading.
-
Camera scanning is faster at capture and can produce sharper results, but it needs a copy stand, a light source and a macro lens, and it offers no automated dust removal. For large volumes of mounted slides, a flatbed with a transparency unit is usually the more practical option.
-
In archival sleeves rather than loose in bags, somewhere cool, dry and dark. Isolate anything that smells of vinegar, because acetate deterioration transfers to whatever is stored alongside it.
-
Scan them anyway and file them under a broad category such as family or holiday, with a fixed reference number in the filename. Put names into the image metadata rather than the filename as you identify people, so the file reference stays stable while the information grows.